Woodworking

The Sun Bear (three legs and a rail) ep4 by DBL

Relatives,

I have been seeking a way, a form, a complete practice in which to exercise actions and thoughts that coincide with larger actions and thoughts that would allow behavioral growth.  Understanding the mechanics and behaviors of this growth was also of interest.  I seek a way to understand while I am actively changing the space in a way single to me, but part of a universal whole in which I am trying to understand.  Causing shifts which rearrange enough to comprehend anew, but not losing the string that pulls me to the center.  This is my present lesson. That seems the most human to me or the human I seek to be.  A searcher of unknowable truths.  A believer in forgotten mistakes.

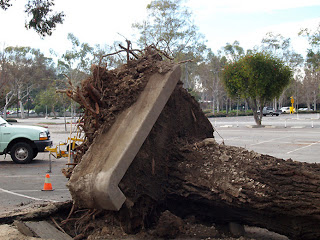
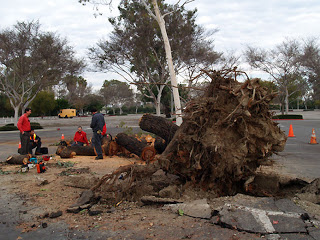
Destruction is just a small aspect of rebuilding.  When rebuilding, my mind thinks, this is when drive must be channeled. Fire does not need direction, everywhere is its path. 

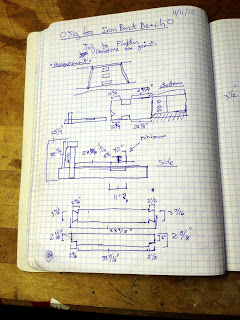
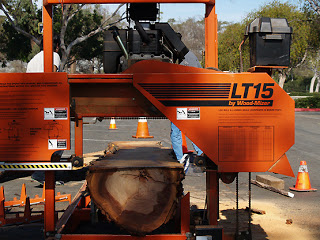
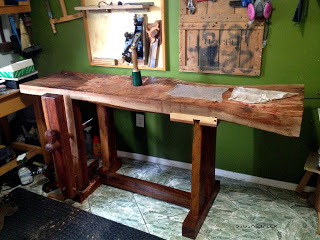
The most literal understanding of what I mean when I say all those vague concepts I chirp all the time, my only straight forward and simple representation and lesson is my work bench.  Beauty do to function and simplicity.  Growth enabled by necessity and a giants fall.

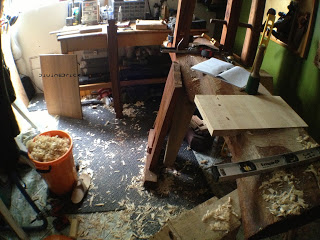
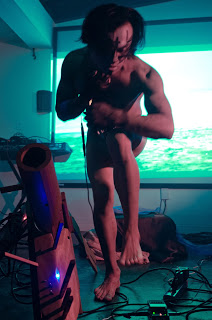
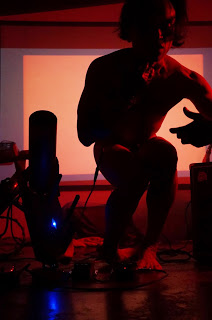
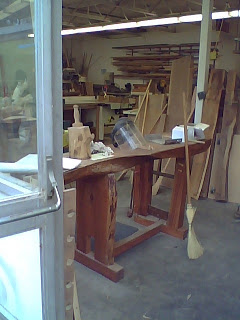
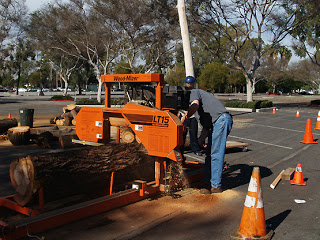
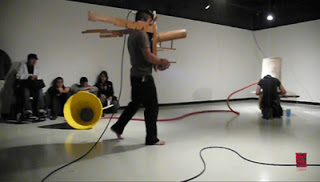
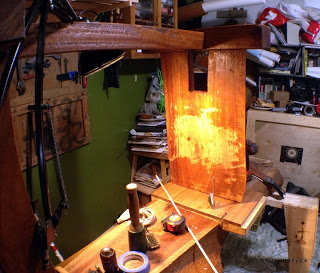
standing in the woodshop of csulb (wood major department)

I needed a bench to work on.  I had the wood.  The know how I fumbled through.  Each mistake reset with the only skill I did have, the only one we all have, to ride the wave on which we travel skirting on the right angle just enough to continue forward, finding aesthetics in falling upward a spiral step.  To move is chaos. To have continuous movement seems to be the harder drive, the more deliberate tendency.

This work bench maybe a certain kind of perpetual.  Either perpetually in my life time or the Sun Bears.

To catch up on the previous post:

post 1

http://dbrp.blogspot.de/2011/07/sun-bear-my-roubo-workbench.html

post 2

http://dbrp.blogspot.de/2012/11/the-sun-bear-jig-and-router_19.html

post 3

http://dbrp.blogspot.ru/2015/06/the-sun-bear-lifes-future.html

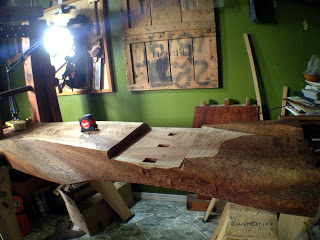
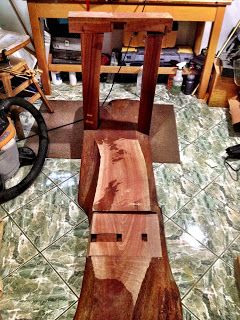
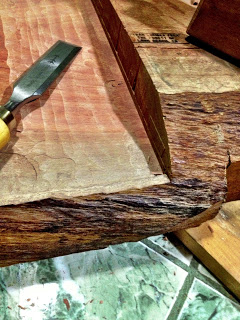
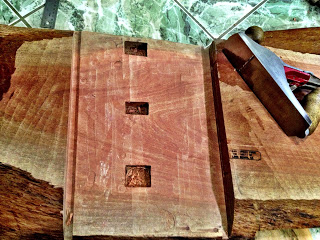
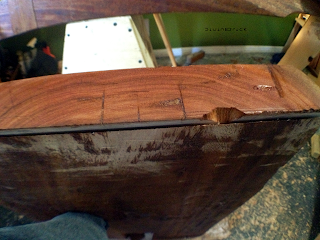
 old tenons removed but not smoothed

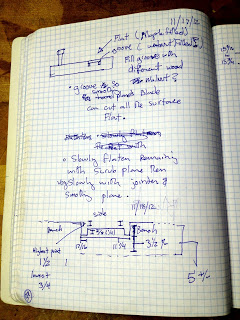
My Bench is up to working condition but let me show you how I re-arrived there.  The last I spoke of the Sun Bear I was speaking of the maple plug planed and ready for the next lamination.  Since I cut off the old tenons of the third leg I was left with less material for the tail of the sliding dovetail.  The dovetail that would replace the failed fox joint that originally held the third leg in place. The walnut addition allow me to have the material to make the socket and tail of the sliding dovetail and hit my target height.  It's an ad-hoc aesthetic that I found both silly and harshly contrasting.  Which I enjoy.

Figuring the height was a bit forgiving.  If my measurements of this moving bench were off I would simply have to flatten out the top to correct the angle that would be off.  Of course even though this top has moved drastically it at one point started true.  This is still prevalent in the left side of the bench.   The area between the two twin dovetails of the first two legs were pretty square, some movement.  Those were the strongest of the joints in the work bench.  From there it went from bad to worse...but more about that in the next post.  Saving me a noodle ache when flatting the top I made sure my estimates were true. 

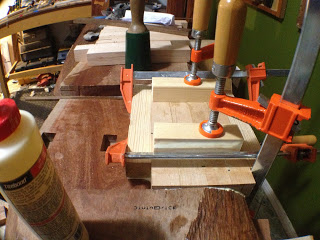
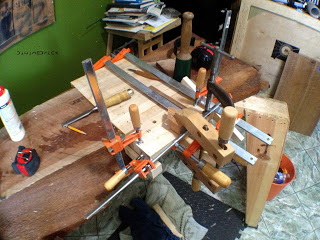
first two walnut pieces

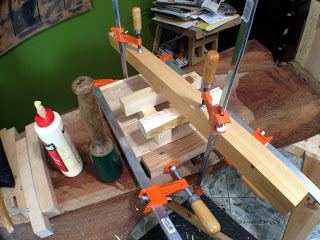
I glued it in the same multi-step method as the maple.

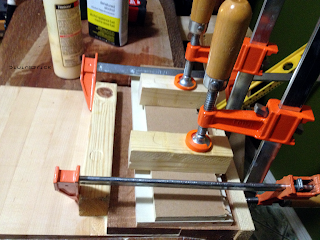
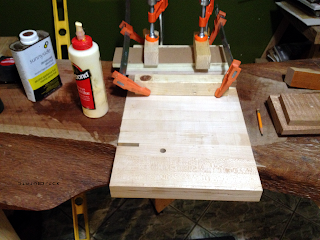
must have gotten too excited this is the only picture of this stage. But you get the idea.
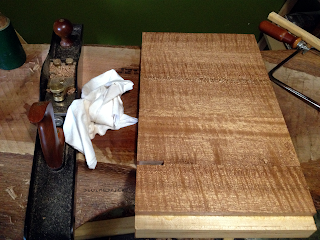
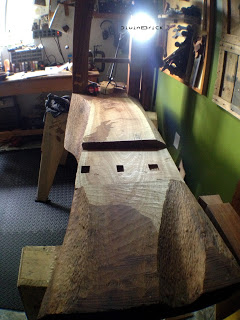
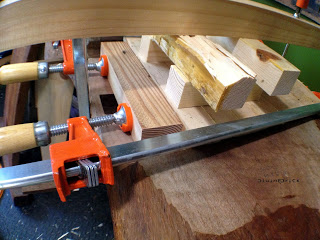
dried and flat

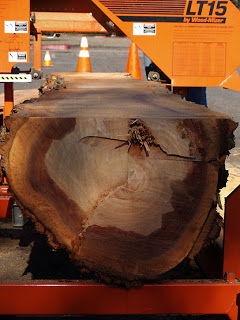
When all the smoothing was done the beauty of the walnut really revealed itself.  It has a gorgeous curl in the grain.  Can't remember where this walnut came from.  Possibly arts school.  My feet have a great view of it when I work.  That's if they look up.

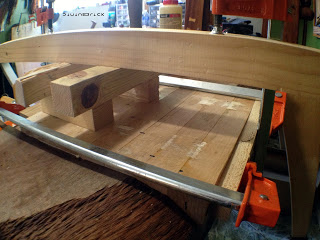
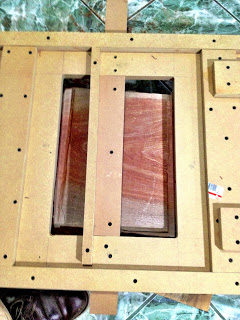
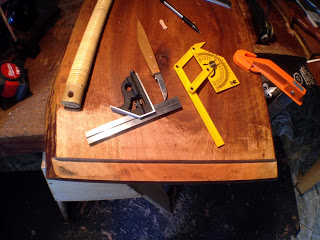
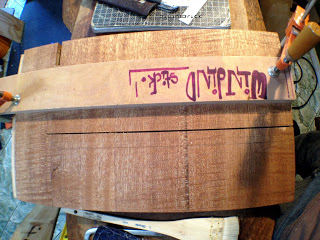
smoothed and ready for the table saw

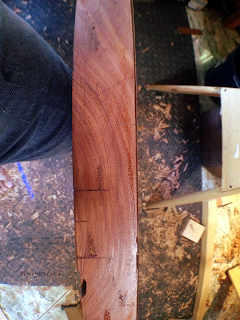
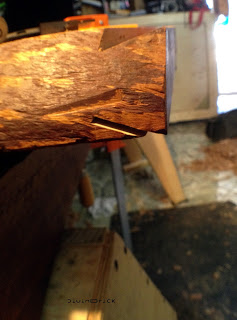
 top of third leg on which the dovetail will be cut

  Most often the table saw is a highly accurate tool, only if your reference for the cut starts from a square point.

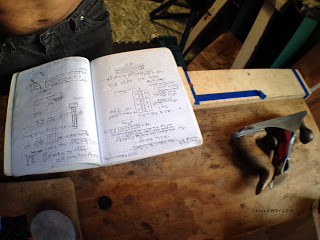
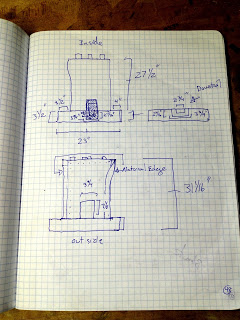
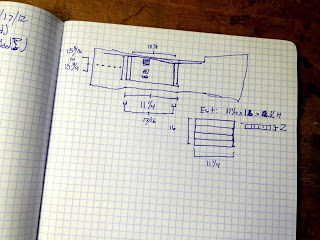
The portions of the third leg that were once square were: the foot, the potion of the slab (slab dims 2 x 16 3/8 x 27 1/4h in.) that enters the foot (foot dims 23 x 3.5x 3.5h in.), the portion of the slab that enters the top of the bench.  As I did when I first built the bench I picked a squarish side, made it more square, then made everything in the general proximity of the parts that would be riding on the table saw square.  Square from there, opposite side as well.

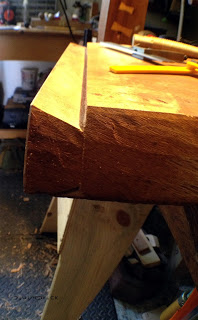
  I did a survey of all the planes and angles of the legs and top and figured which way to fudge and how much.  A very intuitive approach.  Once I made sure the sides of the leg were parallel I finished removing the remaining buds that were the failed fox joint tenons.  The narrow side remained with the natural edge.  Setting the saw to an angle I decided...I just went on how much I needed to angle based on the density and brittleness of the wood (to much of an angle I risk failure on the pointy parts of the dovetail), then I went ahead and made the first pair of cuts down the length riding on the narrow side at the top.

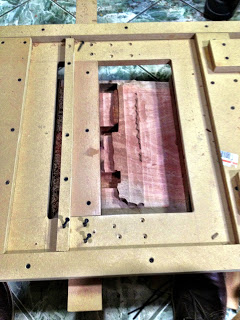
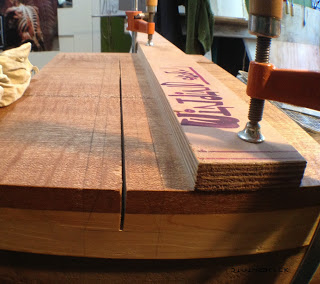
first two cuts done on the tail

I honestly don't remember what I used to cut the length of the cut.  I think I chiseled some of it then cut the rest with my hand saw.  You can see it in the picture.

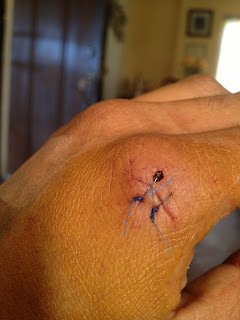
  At certain points in my general making, I still seem to hit mental blockade.  A now too uncomfortably familiar paralyzing unwelcomed friend.  I sometimes think it is a natural instinct to protect the self.  Or maybe it's a crossed wire on a feedback loop. 

  For me, my personal experience, my demise waits patiently behind hesitation.

  The only problem in knowing this is knowing how to temper my willingness to jump.  This willingness has pushed my psyche, my flesh self, my general growth.  I realize this has also cause unwanted effect.  One example is this next step. 

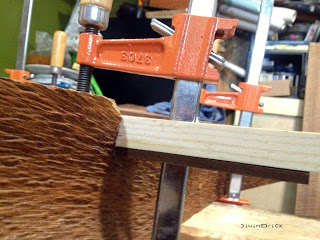
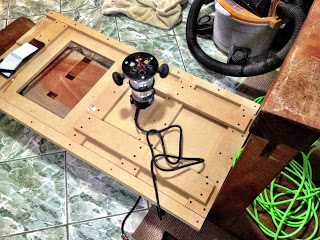
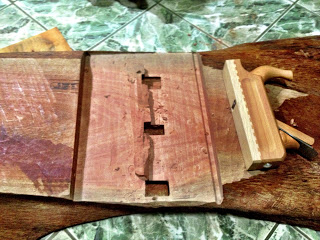
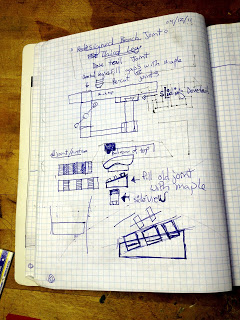
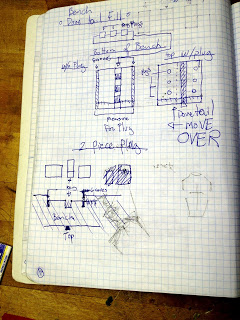
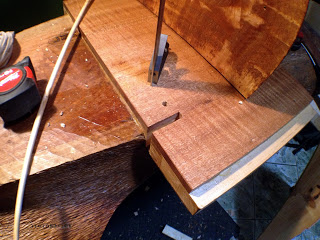
I thoroughly measured this next cut.  The groove for the sliding dovetail.  I decided to use a circular saw to help me make the recess.  My first cut went perfect. down the center.  Stopping short of going through the whole of the newly replaced underside of the bench (I thought it would look neat if the third leg looked like it got shot out and embedded into the top). The second one was just as well, angle true.

The other side of the angled groove, this cut is where I saw myself going out of the marked line.  I had a chance to stop.  I just continued.  I'm not sure if I continued out of impatience or just for the challenge to fix another mistake.  Even though the whole time it felt purposeful, I regretted the cut as soon as I ended it.

This inconvenience left me with a slightly wide groove towards the stop in the cut.  A stopped reverse tapered sliding dovetail.

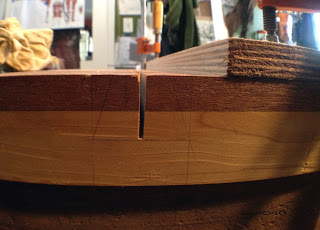
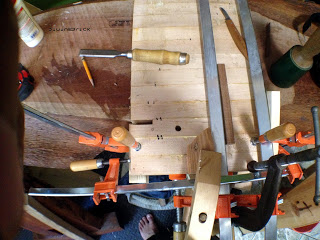
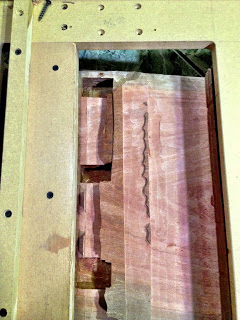
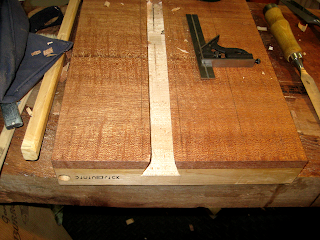
first cut down the middle

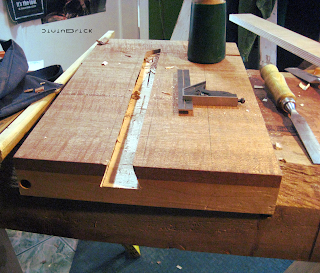
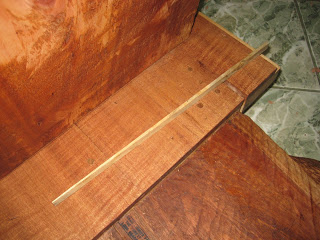
cut stopped short (used one of my winding sticks for the fence)
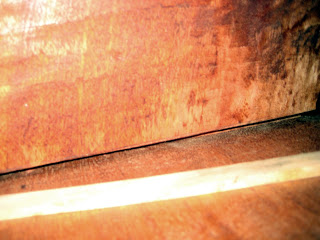
another view

Guess by this time I was too preoccupied with measuring to take more pictures.

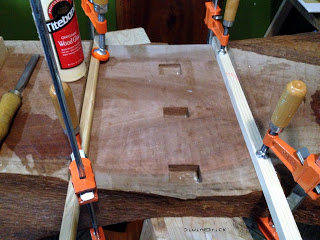
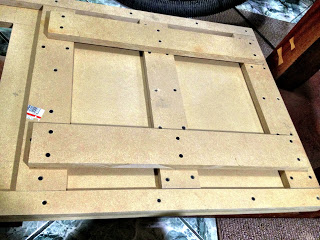
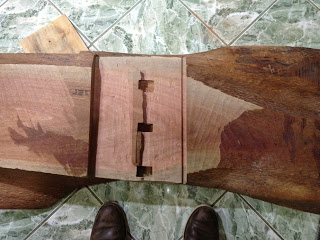
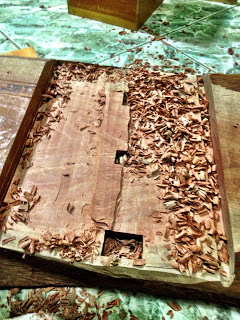
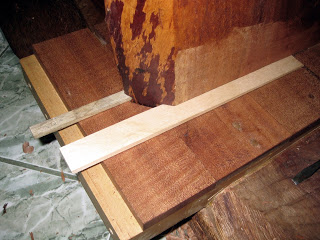
groove cut and cleaned

I chopped the rest of the groove and cleaned it out with the chisel.

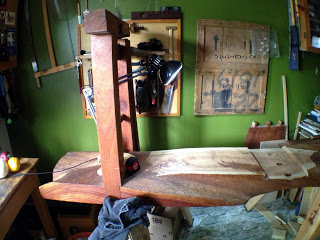
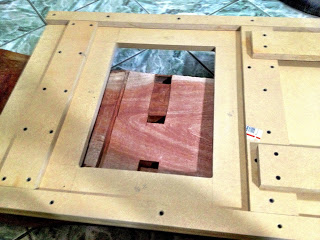
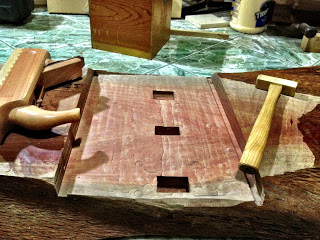
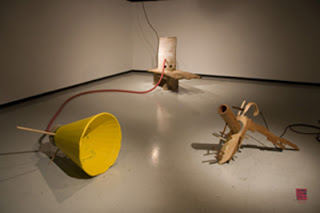
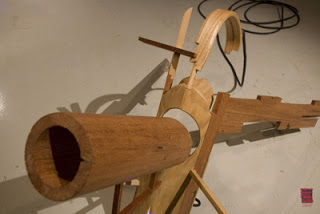
the third leg placed (also compensated for the very slight wind in the leg, that's why it looks at an angle)

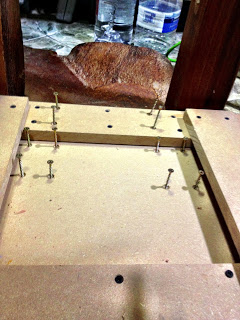
The fit was good enough to require a couple of shims.

I added dowels to secure the lamination (I put few just to see if the need to expand and contracted could be curved)

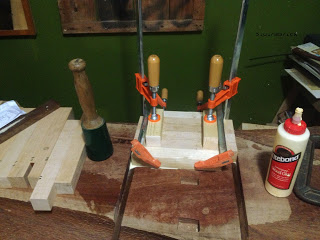
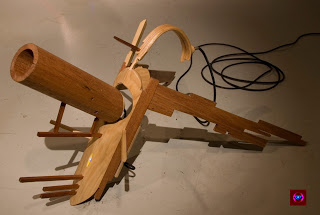
maple and ficus shims

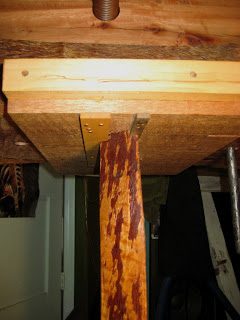
added some copper nails

To not forget this mistake I made sure I could see those shims.

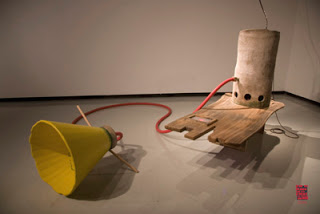
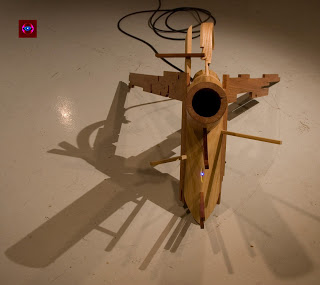
third leg and rail secured

Setting these shims was the last step to make the Sun Bear able to stand.

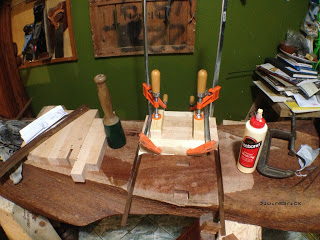
After forcing a few more shims here and there to really lock in the legs (these were tiny compared to the other ones) I was content to start the flatting of the bench.

I remember when I last thought of retrofitting this failed fox joint.  A blue moon ago I started the work.  Because of lack of equipment, interest in other arts, and the influence of corporate work that lots of artist feel must me done to be feed, this project had been in slumber.  In need of making is the catalyst that revived it.

Next post on the Sun Bear will be about it's flatting and clamping additions.

The Sun Bear (Roubo Inspired Workbench) ep3 by DBL

The Sun Bear

(continuation of the retrofit)

Followers,

It has been quite a while since I have posted about The Sun Bear, a Roubo inspired workbench.   My obsession with it has kept me in the studio more than may be healthy in the last few months. Joking of course. The studio practice is a beautiful yet sometimes isolating, an unsaid reality...sometimes.   A project that started...I actually don't remember the birth of the Sun Bear...this is evidence of my neglect, of a beautiful time in my life, and the realization that I will present with this process of rebuilding.  A realization that becomes more solidified as I work on this beast.

*if you are familiar with the past post on this project please continue on.  if you wish to read these first click on these

post1

http://dbrp.blogspot.de/2011/07/sun-bear-my-roubo-workbench.html

 post 2

http://dbrp.blogspot.de/2012/11/the-sun-bear-jig-and-router_19.html

Looking back on my notes it is hard to pin point the birth to 2007,...possibly 2006 in thought.   I know I had it early in 2008.  A year full of fear, love, and memories that are now intimately connected to my art. Looking back on my notes I found that at times I failed to date my thoughts.  Also failed at writing more than I had wished. ..but that feeling forever never satisfied.    

Flipping through my thoughts I found a picture which explained the obvious haze.  Until now I see, that picture was dated 2002 a thought only to fruit in 2006. A picture of the moment I first saw a dream manifest in an institutional hallway of school.  Of course my attention at this time was divided among my divine idealistic muse (my Art Belief)  and this earthly dark angel in the picture.  While tracing back and reflecting on my work and my notes its hard not to re-examaine myself.  Only now a welcoming feeling.

My Bench reflects time spent adjusting and rebuilding self and ideals, simultaneously.  A map of growth.  A continually living being.  If you recall I last left the Sun Bear bottom flatten ready for the maple glue up. 

ok ok I know the pics I will show look posed but I actually work pretty organized now

I hope to catch the good light that sometimes happens in my shop

Tales from the Notebook

I had a few ideas of how to rebuild this fox joint that went awry.  I thought many over but finally settled on this method that includes a lot of intuition and impatience thrown in.  Experiencing still some immaturity.

Just like my Undergrad professor Fred Rose, I see myself as a wood explore.  I must remember each piece of wood came from a whole.  A living Whole.

trying to get out of  the habit of putting the plane on its side

 I chose to use reclaimed maple from a work table top which I acquired from the science department of CSULB, continuing the legacy of this Long Beach resident that once was this bench.  While I attended Cal State, the university decided to remodel and throw out lots of amazing specimens of the yester years of science.  Microbiology being their new emphasis.

 After ripping sticks 11 1/4  x 1 1/2  x 1 1/2, with my new table saw...*clears throat*...fuckin aye finally... I left some with the original table top varnish,   I dry fitted the pieces.  

Before I glued in the maple I glued in the walnut I decided to use to fill in the grooves I talked about in the previous post.  A quick second to spend sometime talking about which way to glue the maple...with the grain of the iron bark or against.  Since these woods most likely have different moisture content and rate of expansion.  I was torn on what to do.  I am not very versed in wood characteristics,  (doubt much exists on iron bark) I kinda just went with my best judgement.  Since the laminated piece will be spanning past the bench top both the top and lamented piece will expand and contract width wise individually with no real risk of tearing each other apart.  Wood expands longitudinally insignificant amounts so their should be little to no risk...at least fixable risk. 

Presently I have a limited amount of clamps.  Which added to this adhoc method to measure the structure of instability.  With the understand of what is the final failing point one can reel back and find the maximum efficiency.  Sounds a bit militant industrial now speaking it, but it is a method that I have come to used when dealing with unknown answers to hard art problems.  You can never have too many claps.  

My approach hinged on the limit of my clamps.  I think I glued 2-3 sticks at a time.  

I had a lil fun with minimal clamping.  Hopefully within tolerance.  

 You can see the old tenons of the fox joint of the third leg in the back left.

Once dried I leveled out the maple replacement.  Too be clear this is the bottom of the bench where the third leg belongs.   Some of the pieces are just free floating. I need to still reenforce these with dowels.  Nicely accenting it.  If you look closely at the picture above you can see by this time I cut off the old tenons of the fox joint on the leg.  I work on many things at once mostly if the projects require breaks.  The maple is now ready for the next layer of wood I decided to add... more on that later

 I will continue on the next post with the final glue up and problems dealing with an un-square object plus the start of the sliding dovetail I decided to go with for the retrofit of the fox joint.  until next time

deciphering the roots-

DBL

Michael Nannery :: DBRP :: Intimatchine @ AHC by DBL


Lovers,

The Show at Almost Holden Collective was intimate, tasty, and seductive.

Intimatchine was a lovely hypnotic landscape of dreams.  Michael Nannery was a memory trip of textures and primal awakenings.  AHC thank you for your hospitality. 

Everyone was open to the freakers we are.  Thanks for your support.

It was a treat to further explore this experiment of self deconstruction which is "Research in Religious Self-Cybernetics: Pruning the Rose, Eating the Thorn".  The ritual object which you see was finally named that night.  Pronounce in Spanish, Butó Flutó.  Thanks Wes.  My need for smirks and giggles in my work is much needed.

Enjoy this peek behind the veil... If you were not present.


Intimatchine


D.B.R.P.


*photos by Christopher Steven Wormald and Brian David. Video by Jacqueline Li and josie j

The Sun Bear (Jig and Router) ep2 by DBL


previous post: /dbrp/2011/07/sun-bear-my-roubo-workbench.html

My Fellow Americans and Terrestrials,

     Yes, last Tuesday I did not post a Tuesday post.  I have no excuse except fatigue.  I got home and just could not resist the warm soft nest in my room.  I owe you twice the words this Tuesday.  Until then I present to you the second stage of a long and over do project.  My Roubo inspired Workbench (The Sun Bear).

 -DBL
Jig and Router

     Originally I had intended to level out the area where the faulty fox joint mortises currently exist using only my able body and bench planes.  Well for sake of speed and a newer experience I decided to finally purchase my first Porter Cable 1 ½ hp router. 

     I had started to level the area using hand tools and left it at a good place for the router to do the rest of the dirty work, but still not be bog down by too much material removal.  Iron bark is dense and splintery and can wear down tools, but can also be machined pretty nicely.  Almost as nicely as its cousin the lemon scented eucalyptus. 
     One of the troubles I am dealing with in this project is the wind (pronounced whined) that exists in the top of the bench.  The pair of legs on the left side are pretty leveled.  The problem is at the other end.   A wind in a board is a twist in which each end of the board is at different axis. 
  
Full view of jig

New unused Porter Cable router

Battens
Anchored at the base of the legs

In retrospect this area should of had more battens

Hand worked unroutered

After the jig was built what was left to resolve was how to routering the middle of the area that was being removed.  Since the base of the router has a radius of 2 5/8 in.  I had to add a movable supporting sled in the middle of the jig.  As I worked closer to the center I readjusted the sled.

Support sled


When I had the majority of the area routed I decided to remove the jig and do the rest of the finesse work using hand tools.  Hopefully I have a good flat reference to finish flattening it with out too much grief.  


*A side note.  The grooves I have left on each side of the flatten area will help my squaring of the top.  To do this I will use my Jointer plane.  Some bench plane blade's do not extend to the edge of the body.  This groove will correct for the area that the edge of the jointer plane can not reach.  I will later fill this area with a contrasting wood or an exotic wood for a nice adhoc detail.
Scrub plane for the rest of the hogging out


After using the scrub plane
Rounded corners

Cleaned up area where the router missed
     That is the stage the Sun Bear remains.  Until the next time be safe and love what you do.  Oh speaking of.  When woodworking, using heavy equipment, power tools, sharp tools or when you just want to do something right listen to your body and mind and the spirit will follow.  When one of them is ready to quit, take a break.  Remember this is fun, not work.  I forget this often and this time I got a gentle reminder.  Just when I was about to quit, just when I felt myself rushing, I told myself "ok time to quit".  My mind did but my body followed through… sliced my hand with my recently 1000 grit sharpened paring chisel.  Luckily I was doing very light work, but the tool had a very keen edge. 
Mental/ Physical Fatigue + Sharp Tools = Two Stitches
            
*Here are some Tales from the NoteBook for your musing.


The Sun Bear (My Roubo Workbench) ep1 by DBL


Creators,
There is one woodworking piece of mine that I think I have not given enough exposure.  Do to the fact that it is the most functional piece I have made and that it is a piece that I constantly use, I am sad to say that ironically I have not given it enough acknowledgement. 
This piece has an interesting history and a history that I hope will last longer then I.  As of now it is a piece in need of repairs do to this history.  
This piece is my workbench.  An 18th century Roubo inspired workbench.  Very non-traditional with its natural edges, two square corners, tripod style legs and single stretcher, it is at times unfriendly with its functionality and a quark to see and use.   

It has weathered my blood, sweat and tears.  At times has waited patently for me to use and has held me up for short naps late nights at school in the past.  It also has secrets here and there that it keeps for me.  I have lovely memories being covered in dust beside my bench with lust and trust, at school working waiting to find the perfect moment to confess my love to a girl of my dreams.  But that's another story.  
As said before do to its history and design it is in need of rework, which is why this bench will now exist and have its rebirth in cyberspace
The story started back when I was in college and a new student to wood exploration.  In need of wanting to work on a piece exclusively in hand tools and in want of building something that would last me a lifetime, and be functional though out that time, I decide to make a Roubo workbench.  
A Very Very Brief History of the Roubo
André Jacob Roubo was a French cabinetmaker and author.  The son and grandson of Master Cabinetmakers, he earned that designation in 1774 through the publication of his masterwork treatise on woodworking.  In his publication, in wish I can only presently wish to own,  he wrote of a jointers work bench, design and specifications.  This Roubo Workbench was a beefy one.  Here are some pictures of this 18th century monster.
The top made of a thick solid slab and with very archaic (but fast and functional to the skilled) clamping devices it is a design not very reasonable in the modern world.  This appealed to my impractical nature.  Now only realizing an impactical nature that is much more practical then I was aware of  since there is a revival of the Roubo workbench among wood workers. 


Most modern work benches have tops that are laminated from very stable quarter sawn pieces.  This is because one can create a laminated top with greater ease and with more reliability than try to find a massive hardwood tree cut a stable piece of this tree and make a top.  This would be laborious, expensive and the wood will move (lose its squareness) in the years it would take for it to dry.

The Giants Felling
One very wet and windy winter in 2007,,,,I think,  an Iron Bark Eucalyptus fell which was located in the parking lot of my university, Cal State University, Long Beach.  Our department was in luck!  The luck was two fold, lucky the school was not in session, no cars or delicate little humans to smash for this tree was at least 4 stories high and at least 4-5 ft across  that’s just the trunk (the Iron Bark is a very dense and hard wood, when dry!).  

There were limbs everywhere.   We were also lucky that we owned a portable bandsaw mill.  That winter day we spent most of it milling the trunk and bigger limbs to sizable slabs so we could put them in our pick-up trucks and haul them back to the shop.  The interesting and dangerous character of the Iron bark is that it is a very high growing tree that is brittle due to the weaving of the fibers and density.  This particular tree seemed to have been rotting in the roots.  One strong wind and it gave.   

The scene was just awe provoking.  The tree literally fell broke and bleed.  As we moved the pieces around and stood some up water ran out in streams creating pools of clear blood.  It was a very curious and eye opening experience.  The, smell fantastic.  A fallen giant in our Urban Forrest. 
Fred Rose working the Mizer.


One trip with just a fraction of the tree in my truck made it bottom out.  I estimate one trip was one ton plus.  


My Roubo (the Sun Bear)
The pieces probably stayed in the stacks to dry for bout a half a year to a year.  At this time I decided to make my bench with not so thoroughly dried wood.  I knew in time the bench would move.  And will always do to temperature and moister change.    
I will not bore you with the design aspects of the bench they are personal and always in flux, but the making is something to be mentioned.  The only time I used woodworking machinery on this piece was in the milling of the top and the milling of the apron and legs. For the leg vise I did use a router jig to make the wooden screw.  I squared the top, chopped the tendons and mortises using traditional hand tools. It was and is a very laborious thing and I love it.  Oh yes and no glue was used.  Makes future repairs and mods easy.
So the present day:
As I said before the wood was still wet as I worked on the bench.  Now the top is warped partly do to its drying/movement and a bad fox joint (I will explain what that is later). 
The first step in the rebirth is the re-design of the third leg.  The fox joint is a tenon joint that wedges when hammered in, creating a once square tenon into a wedge preventing it from it ever coming apart.  The fox joint I created was ill in execution.
I had some thoughts about making a dovetail joint to attach the leg but first I must fill in the mortise that was previously there and create a square area to attach the leg.  I will square the area to the other two legs as much as possible since I am dealing with a piece of wood that is not square to begin with.  The essential squaring that will be need for it to function will come later.  In dealing with this piece everything is relative: squareness, levelness and all.  This does not mean it will not be perfect for its function.  There is too much emphasis on perfection in this world.  Perfection is relative. 
Here are some vids showing the old fox joint mortises, the leveled area to fill and the old tenons and third leg.  

My Roubo still needs hardware, dogs, and other various things that will make it a solid work bench and an odd thing to see. 
The next update will be the making of the plug and the design of the new joint.  Dovetail, twin tenon, or something absurdly inconvenient?
Until next time,
-DBL    


Jackal: DBRP Performance at The Torrance Art Muesums Zoom 2 by DBL

jackal at tam by DBRP


Description:

Three performers: The Handler (which had the Jackal by a leash), the Jackal (which wore a leather headpiece) and the Controller (behind the laptop).

The Jackal and the Handler performed on a ring of salt.

The headpiece had a web cam on the front (which served as an eye), a microphone (which served as a digital gag), and a L.C.D. screen (which served as a filtered window to reality). The live video and audio feed, from the Jackal, was first processed by the Controller which was behind the laptop and in front of the projection. Then the feed was sent to the projector and back to the Jackal, transformed and filtered. What the Jackal saw and the audience saw was the equal.


Performers:
The Handler- Wet Mango
The Controller- Aaron Moreno
The Jackal- DBL

Tarfest Recap- "Research in Performance, Sound, and Dissent" by DBL

Cohabitants,

With hopes of transforming each molecule and atom of the Tarfest audience with waves of undulating, random and beaten sounds, this invocation delivered.

To tilt the unbalanced unconscious was the goal. Success measured in unveiling of error for tomorrow to be recalculated.

Thanks to ones that transformed into characters of weight, appreciation for the passive willing to absorb, acknowledgment for those active but not brought to light and special thanks to two extraordinary ladies (and one life stream in utero), willing testifiers, active and transformed.

One peculiar thing. Just before the performance music was turn on in the gallery, played through the p.a. system. By the end it fused with the noise of the performance and gave a nice texture.

This video and sound objects were presented the remaining days of the show.

-DBL

Wooden form functions as a resonator feedbacking onto itself to produce a wave of undulating texture. Headpiece has a pitch bended analog synth. Piece was and exploration in control symbolism and recontextualization them.


DBRP Performing at Tarfest 2009 from DBL on Vimeo.

DVD copy now available (with extras)


TarFest September 25th by DBL

On September 25th DivineBrick Research Sound Projects will have an opportunity to perform at this years Tar Fest reception. The performance will take place at the Korean Cultural Center at 5505 Wilshire Blvd 6p-10p. This is opening night after that the work and a video of the performance will be on display.
In honestly I do not know much of the Tar Fest. It appears it has been occurring since 2003. For more info visit the Tar Fest site here.
It is quite exciting not knowing what to expect of the audience or of the work. This performance has been slowing developing and is at an advance state of transmutation. There is still a lot to learn but it seems all is leading towards a reactionary illuminated state. Or that is the hopes. There will also be a guest performer, a Vishnu channeling, great art peer and contemporary, Vishal Goklani.
The hope is also to have a lot of fun with this one and take it to the next level of hilariously profound absurdity that opens ones eyes and makes one aware of all the strings that pull on ones belief's. So humor us and join us on a eagle trip though a landscape of noisy oceans, fascist peaks, Alchemical rivers of information lies, reflecting pools of self hate, and along the way rest stops of WTF.

-DBL

Old Guy Running Exhibit by DBL

The show consisted of 2 wooden pieces one a table the other a headpiece and two performers.

The table was not a table in traditional sense but more of an organ or instrument of sorts.  It worked as a resonator.  The top barrel shaped form was made of ceramic.  Inside it was a speaker and a microphone.  The microphone ran through an electronic effects device, to an alpine car amp then to the sub-woofer speaker in the form.  The actual table was made of lumber from the urban forest of long beach.  This piece was controlled by one performer through nobs on the top of the table.

The head piece was made of reclaimed lumber from an old Baptist church/ Pentecostal church.  The headpiece also had a microphone located in the conal shaped form and a analog synth embedded in the body which also had nobs and circuit bending switches.  This piece was worn and controlled by the second performer. 

Here are some shots from the show:

Photos and Video by Jeremy Icanbomb

Tree Exhibit/ Performance by DBL

Tree Febuary 2007

Here are a few shots of the tree show by DBRP.

The two wooden forms in the foreground were feed backing resonators/ drums which contained a microphone and a speaker each.  They are hybrid bazooka speakers much like ones used in autos.  The third form, the tower, in the back contained an amp and speakers.  The microphone ran from one "drum" through pedal effects to the amp then to the opposite speaker in the other "drum".  

Two performers where stationed outside the gallery each with one "drum" 100 yards apart.   What one played on one "drum" was heard on the opposite drum heard by the other performer.   Both performers were heard by people in the gallery through the speakers housed in the tower. 

Photos by Jeremy Icanbomb

treeweb.jpg

Limb 2007

Limb

Video was installed at location at which it was filmed. Video was 45 minutes long it started with a figure at one corner and a rope on the other, the figure tied his leg and arm together then proceeded to try to move and stand, then the figure untied himself then the video loops.

limbwm207.jpg
limbwm307.jpg